
Table of Contents
- Signs of Readiness for Solid Food: When to Start Purees
- 1. Iron-Rich Purees: The Best First Foods for Babies
- 2. Single-Ingredient Vegetable Purees for Beginners
- 3. Fruit Purees: Naturally Sweet First Foods
- 4. Batch Cooking and Freezer-Safe Puree Strategies
- 5. How to Start Baby Led Weaning Alongside Purees
- 6. Best Feeding Equipment for Babies Starting Purees
- Common Mistakes to Avoid When Introducing Purees
- Frequently Asked Questions
Last Updated: September 26, 2026
Signs of Readiness for Solid Food: When to Start Purees
Most babies are ready for solid food around six months, but the calendar is a guide, not a rule. The real signal is a cluster of developmental signs. This guide from Bub and Co covers the six best baby food purees for beginners, plus how to spot genuine readiness.
Watch for these readiness signs before introducing any baby food purees:
- Sitting upright with minimal support and holding the head steady
- Good head and neck control, so food can be swallowed safely
- Showing interest in what you're eating, reaching for food or opening the mouth
- Losing the tongue-thrust reflex that pushes food back out
- Bringing objects to the mouth and making chewing motions
If your baby was born prematurely, their developmental age matters more than their birth age.
1. Iron-Rich Purees: The Best First Foods for Babies
Iron-rich purees matter more than any other first food because a baby's stored iron starts running low around six months. Breastmilk and formula alone can no longer meet the demand.
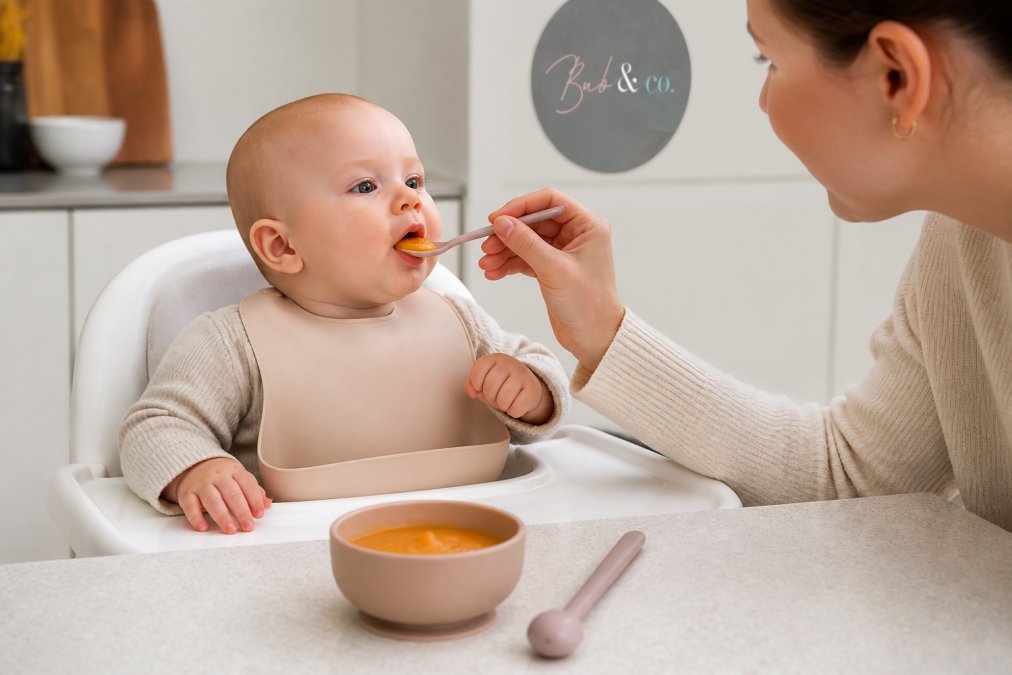
- Well-cooked pureed beef or chicken blended with a little cooking liquid
- Pureed lentils or chickpeas, thinned with water or breastmilk
- Iron-fortified infant cereal mixed to a smooth consistency
- Pureed tofu, which is soft and easy to blend
2. Single-Ingredient Vegetable Purees for Beginners
Single-ingredient vegetable purees are the safest starting point because they let you watch for reactions to one food at a time. Introduce a new vegetable every two to three days.
3. Fruit Purees: Naturally Sweet First Foods
A practical way to run this:
- Offer a vegetable puree first at a meal, then a fruit puree as the second taste, so the savoury flavour lands while your baby is hungriest
- Rotate at least three different vegetables across a week rather than repeating the same one
- Keep fruit portions small at first, a couple of teaspoons is enough to build familiarity without letting sweetness dominate
- Don't add sugar, honey or fruit juice to purees; the natural sweetness of ripe fruit is plenty
Fruit-by-fruit notes for beginners:
- Apple and pear, steam until a fork slides through, then blend. Mildest starting fruits; rarely cause reactions.
- Banana, mash raw with a fork. It browns quickly, so serve immediately or mix with expressed milk.
- Avocado, technically a fruit, and one of the best first foods because its healthy fats support brain development. Mash with a fork; no cooking needed.
- Peach and mango, steam if firm, otherwise mash raw. Higher in natural sugars, so pair with a vegetable at the same meal.
- Berries, introduce after milder fruits. Seeds and acidity can irritate some babies, so strain or blend smooth and watch for nappy rash or skin reactions.
Fruit is a tool, not a treat. Used alongside vegetables from the first weeks, it builds a broader palate rather than a narrow sweet tooth.
4. Batch Cooking and Freezer-Safe Puree Strategies
Batch cooking is the biggest time-saver in the first months of solids. One afternoon of steaming and blending can cover two to three weeks of meals.
Here's a workflow that works:
My First Solid Bundle – Baby Silicone →
- Pick two or three vegetables and one iron-rich base for the session
- Steam everything until soft, keeping each ingredient separate
- Blend each to a smooth consistency, adding cooking liquid as needed
- Cool quickly, then portion into ice-cube trays or small freezer-safe containers
- Label with the food and date, then freeze
5. How to Start Baby Led Weaning Alongside Purees
You don't have to choose between spoon-feeding and baby led weaning. Combining both gives your baby the texture practice of self-feeding and the iron delivery of fortified purees.
6. Best Feeding Equipment for Babies Starting Purees
The right gear won't make your baby eat, but it removes friction from every meal. When you're feeding a baby three times a day, small annoyances add up fast. Here's what actually matters when choosing equipment.
What to prioritise, in order:
- Safety and material, look for food-grade silicone or BPA-free plastic. Silicone is soft on new gums, tolerates heat and cold without leaching, and doesn't hold stains or odours the way some plastics do. Avoid anything with cracks or scratches where bacteria can hide, and replace spoons once they show wear.
- Stability, a suction base is the single most useful feature on a bowl or plate. It keeps the vessel where it belongs, which means less food on the floor and more in your baby's mouth. Check that the suction actually grips your highchair tray, some bases only work on smooth surfaces.
- Spoon shape, a shallow, soft-tipped spoon is easier for a beginner to manage than a deep, rigid one. Long-handled spoons are for you; short, chunky ones are for your baby to hold and explore.
- Ease of cleaning, dishwasher-safe pieces save real time. Anything with narrow crevices or non-removable parts is a false economy.
- Portion control, small bowls suit small appetites and reduce waste. You can always refill.
What you don't need:
- A blender or food processor is convenient, but a fork, a sieve and a pot of steam will get you through the first weeks
- Specialised baby food makers rarely earn their bench space, a steamer basket and a stick blender do the same job
- A full set of matching everything. Start with one bowl, one spoon and one bib, and add as you learn what your baby actually uses
| Setup | What's Included | Price | Best For |
|---|---|---|---|
| Suction Bowl and Spoon | Bowl, spoon | $18.50 | Testing one piece first |
| Mini Bub Set | Bib, bowl, spoon | $25.00 | Compact starter kit |
| Ultimate Set | Plate with lid, bowl, bib, spoon, fork | $44.95 | Full mealtime coverage |
| My First Solid Bundle | Bib, bowl, spoon, sippy cup, plate, placemat | $60.00 | One coordinated set |
Common Mistakes to Avoid When Introducing Purees
The most common mistake is rushing texture. Parents who keep a baby on smooth purees too long often find the transition to lumps and finger foods becomes a battle.
Other pitfalls worth knowing:
- Adding salt or sugar, which babies don't need and which can strain immature kidneys
- Offering juice or sweet drinks in place of milk
- Introducing multiple new foods at once, which makes any reaction hard to trace
- Leaving a baby unsupervised with food, even soft food
- Giving whole nuts, chunks of hard raw vegetable or round foods that pose choking hazards
Frequently Asked Questions
What is the best first puree to start with for a baby?
Iron-rich foods are the priority for a first puree because babies' iron stores begin to run low around six months. Well-cooked and pureed beef, chicken, lentils or iron-fortified infant cereal are all strong choices. Start with one single-ingredient puree, offer it once a day, and keep the texture smooth and thin. Wait two to three days before adding another new food so you can spot any reaction.
What are the signs that a baby is ready for solid foods?
Look for signs of readiness for solid food rather than going by age alone. Your baby should sit upright with good head and neck control, open their mouth when food is offered, and be able to move food to the back of the mouth to swallow rather than pushing it straight out with their tongue. Most babies show these signs around six months. If you are unsure, check with your child health nurse or GP before starting.
How do I introduce allergens when starting baby food purees?
Introduce common allergens one at a time, in small amounts, during the day when you can watch your baby for the next few hours. Peanut butter thinned with water, well-cooked egg, dairy yoghurt, wheat and soy are common starting points. Offer the allergen alongside foods your baby already tolerates, and keep offering it regularly once it is safely introduced. If your baby has eczema or a family history of allergy, speak to your GP about a plan first.
Is it better to make homemade baby food or buy store-bought purees?
Both work. Homemade purees let you control texture, thickness and ingredients, and batch cooking keeps costs down. Store-bought options are convenient for outings and travel. Many families use a mix: batch cook and freeze purees at home for the week, then keep a few pouches or jars on hand for days out. Whichever you choose, check labels for added salt, sugar and preservatives, and offer single-ingredient options in the early weeks.
How much food should a 6-month-old eat at their first meal?
Start with one to two teaspoons of puree once a day, and let your baby set the pace. Milk (breastmilk or formula) is still the main source of nutrition at this stage, so purees are about practice, taste and texture rather than filling them up. Increase gradually to a few tablespoons over the following weeks. If your baby turns away, closes their mouth or pushes the spoon aside, they have had enough.
Leave a comment